Showing posts with label dessert. Show all posts

Sunday, January 1, 2012

Turtle Bars


I am sitting here laughing at myself! Oh wait, first things first! Happy New Year! So, I have a blog and I normally post food on my blog. And I take tons of pictures, in fact I got a sweet new camera for Christmas, Woo hoo! I especially take lots of pictures of food, because I'm constantly making good food and trying new recipes and have an awful memory because of all the other things that I'm trying to remember every day, so I take pictures to remember what I've made and hope that one day I'll get a chance to share it with you on my blog and *pause to breathe* last night we had a some friends over for a New Years Eve party and I had been out of town for a couple of days and got back into town just 2 1/2 hrs before our guests were to arrive (for the kids pre-party part of the party). I had some fast cooking to do! I normally spend 4-5 hrs the day before doing party prep and all day the day of the party doing party prep (yes, I take my parties seriously!). Yesterday I had 2 hours. So I made my tried and true favorites! In all the chaos I took not one picture of the dishes I prepared! NOT ONE! Oh, I have some great pictures of friends dancing their little tails off! And cute little ones shaking a tail feather too! Speaking of little ones...my little princess is friends with my dear friends little boy who is just a couple weeks older than the princess...and let me tell you...dare I say...I want her to marry this sweet little brown eyed boy! He's got some moves too! Ok, back to my story. No pictures! But I really want to share this awesome recipe with you. So, just now I went to the kitchen to snap pictures of the turtle bars. GONE! The entire pan is GONE! I think I cut 30 bars. Oh wait...there was this one sad little corner piece left. The rest. GONE! So, here is an amazing Turtle Bar recipe and a pitiful little corner bar pictures to show for it!
Oh, look at that teeny, corner piece. But it still looks good!

mmm...the caramelly goodness!

TURTLE BARS

2 1/4 cups flour
1 cup butter, room temp
1 cup brown sugar
1 pkg caramels, I use the little caramel bits this time
1/3 c heavy cream
1 cup pecan halves
1 cup semi-sweet chocolate chips

Heat oven to 350. Line 9x13 baking dish with foil or parchment paper. In a food processor combine butter, flour and brown sugar. Mix until crumbly and press into the bottom of the lined pan.
In a microwaveable bowl add caramels and cream and microwave for 1 minute. Stir and microwave for another minute. Continue until the caramel is smooth. Pour over the crust. Sprinkle with the pecans and bake for about 25 - 35 minutes or until the caramel is bubbly and the crust looks done. Sprinkle with the chocolate chips and place in a cool place until set.

Cut, serve, eat and enjoy!


Warmly,
Mary

Thursday, December 15, 2011

Chocolate Peppermint Bark


Have you ever made a gingerbread house? It's kind of a tradition around here to decorate a gingerbread house. It's super fun for the kids and oddly stressful for me. I'm a little impatient and I very meticulously align the walls and roof so that the kids can start slopping frosting and candies on the house only to have pieces sliding around everywhere. This year, I did it the right way. I built the house and we're letting it sit over night to solidify so that the kids can have at it with their confectionery creativity without me trying to rig things up just to hold the poor little crooked thing together! So what do you do with your 5 year old after breaking the news that he has to wait yet another day to adorn his creation? Make candy!
I have never made Christmas bark or any bark for that matter. I can't believe how easy this is. And super duper good too!


CHOCOLATE PEPPERMINT BARK
2 cups crushed Oreo cookies
1 pkg semi-sweet chocolate chips
1 pkg milk chocolate chips
4ish candy canes, crushed

Line a jelly roll pan with waxed paper or parchment paper. Evenly spread cookie pieces in the pan. Pour chocolate chips in a microwaveable bowl and microwave for 1 minute, stir. Continue to microwave in 30 second increments (stirring in between) until the chocolate is all melted. Evenly pour over the cookie pieces. Sprinkle with candy pieces. Let sit until set - in the fridge or somewhere cool. Break into pieces and munch away! Or better yet....gift away!

Enjoy!

Warmly,
Mary

Heath Cheesecake


If you know me...like really know me, you know that I'm a party girl! Not THAT kind of party girl, but in our home...we find every excuse that we can to have a party and have people over for food and fun! My friends have come to expect a lot of goodness at these parties too. I am by the way...flattered! The latest party was Superman's Birthday and ummm ahem *clears throat* Superman is not a big fan of cake or cupcakes *clears throats*tear*. I KNOW! Rude huh...whatever to each his own. Whatever. Superman is however a huge fan of cheesecake and brownie sundaes. So, being the good wife that I am, I put all my dreams and desires for this birthday party aside for him. And I was pretty pleased by my choice to make Heath Cheesecake. Just so you know, this is super rich and sweet and NOT for the lightweight dessert connoisseurs!


HEATH CHEESECAKE
Ingredients
2  cups Graham Cracker crumbs
1/3 cup butter, melted
1/4 cup sugar (for crust)
3-8oz pkg cream cheese, room temp
3 eggs, room temp
3/4 cup sugar (for cheesecake filling)
2 tsp vanilla
1 cup heath bits, divided
4 oz semi-sweet chocolate chips
1/4 cup heavy cream
2 Tbl butter

Heat oven to 350.  Combine graham cracker crumbs (I grind them in a blender), 1/4 cup sugar and butter. Mix well and press into the sides and bottom of a 10" spring-form pan. Bake at 350 degrees for 8 minutes.
In a large mixing bowl, beat cream cheese, sugar and vanilla until completely smooth, but do not over mix. Add eggs, one at a time, beating well and scraping the sides and bottom of the bowl after each addition. Again, mix well but do NOT over mix. Stir in 3/4 cup of the heath bar bits. Pour over the crust and bake at 350 degrees for 10 minutes. Reduce heat to 325 and keep baking for an additional 45 minutes  or until filling is almost set. Turn the oven off but keep the cheesecake in there for 2- 3 hrs. DO NOT OPEN THE OVEN WHILE BAKING!
Remove from the oven and allow to continue to cool at room temperature.
Let's make the ganache topping. Add chocolate chips and cream to a small microwaveable mixing bowl. Microwave for 1 minute. Stir until melted. Add butter, cut in chunks. Stir until everything is melted and shiny. Drizzle over the top and sprinkle with the remaining heath bar bits.
Chill in the fridge for at least 2 hours!


Enjoy!


Warmly,
Mary

Tuesday, November 29, 2011

Homemade Cherry Pie


HOMEMADE DINER CHERRY PIE
I'm taking time out of my super busy morning of listening to the warrior narrate the Peter Pan movie to bring you this delicious Cherry Pie recipe!

Life has taken a few major turns for my family over the last month so on top of now being a mom to 4 kids rather than just 2 and the fact that my computer decided to allow itself to be a victim of hackers and my iphone dying a slow painful death...I've been tech-free and busy for the last month. Thus no princess and warrior treats for you...sorry! The recipes have been written and the food has been baked and the belly's have been full and the pictures have been taken, I just haven't had a chance to share them with you. And now that I am back to the current decade of technology again and 3 of the 4 kids are at school...I'm visiting you, my dear friends!

There are several really good recipes that I can't wait to share with you but this one was on my mind since our last vacation. Last week when we were traveling, we ran across a Classic American Diner in a sophisticated lively downtown area. Superman and I were both intrigued and knew this would be a fun change up from our typical choices. Where can you go wrong with breakfast at 8:00pm, burgers, fries and milkshakes! It was too late, I wasn't going to have pie, but don't diners just make you think of pie? I think so! And I'm sure that their pie would be delish! But I'm not a canned pie filling girl. I like fresh cherries and not a lot of that gooey food coloring stuff. This was some good pie!


HOMEMADE DINER CHERRY PIE

Filling
6-7 cup fresh cherry's (I used Bing)
1/2 cup water
2 Tbl lemon juice
1 cup sugar
4 Tbl corn starch
1/4 tsp almond extract
1/2 tsp vanilla extract

Heat oven to 350. Prepare double pie crust, either store bought or homemade. In a medium saucepan over medium heat add pitted cherries, lemon juice and sugar. In a small bowl stir the cornstarch into the water and stir until the cornstarch is dissolved then pour into the cherry mixture. Allow the mixture to come to a boil and the reduce heat and simmer for 5 minutes. Stir in almond extract and vanilla. Pour the cherries into the bottom crust and top with top crust. Loosely lay a piece of foil over the top of the crust and bake for 45 minutes. Remove the foil and bake for an additional 15 minutes.

Top with vanilla ice cream and enjoy!


Warmly,
Mary

Wednesday, October 26, 2011

Pumpkin Bars with Cinnamon Browned Butter Frosting

The best Pumpkin bars ya every had? Yep, right here! The cinnamon browned butter cream cheese frosting takes the cake! If you never ate frosting by the spoonful yet, you will today! You're not seeking for a hint of pumpkin flavor, their bursting with it! Plus their moist and soft. And did I mention the frosting? Oh, I did? Well...it's...let's just say... OH MY! These babies are good!

PUMPKIN BARS

1 15 oz can pumpkin puree
2 cup flour
1 ½ cup sugar
¾ cup oil
4 eggs
2 tsp baking soda
2 tsp cinnamon
1 tsp baking powder
½ tsp ginger
½ tsp nutmeg
¼ tsp allspice
¼ tsp cloves

Cinnamon Browned Butter Frosting
½ cup butter
1 8oz pkg cream cheese
3 – 4 cups powdered sugar 
1 tsp cinnamon

Heat oven 350. In a small bowl combine flour, soda, cinnamon, ginger, nutmeg, allspice and cloves. In a another bowl, whisk eggs, oil, sugar and pumpkin and mix well. Add dry ingredients to the pumpkin mixture and mix until well combined. Pour into a greased 9x13 pan. Bake about 30 minutes.

Now for the amazing frosting! In a saucepan melt butter over medium heat. Continue to let butter cook until golden brown and a light nutty aroma. Allow to cool. Once it’s about room temp, beat with cream cheese, cinnamon and powdered sugar and spread over cooled bars. Refrigerate for easier cutting.

Enjoy!
Warmly, 
Mary

Thursday, October 20, 2011

Apple Crisp Cheesecake Bars


 These sweet and savory desserts are the perfect combination of cheesecake and apple crisp! No more trying to decide which desert to try…here you have two in one! Thank you Jo for letting us and at least 40 of our friends come pick apples at your beautiful place! You are the sweetest most generous gal I know! This was dessert #1 from the apple picking!


APPLE CRISP CHEESECAKE BARS
Crust
2 cups flour
1 cup powdered sugar
1 cup frozen butter

Cheesecake
3 (8-ounce) packages cream cheese, room temp
3/4 cup sugar
3 large eggs, room temp
2 tsp vanilla extract

Apples
4 Granny Smith apples, peeled, cored, chopped
3 Tbl sugar
2 tsp ground cinnamon
½ tsp ground nutmeg

Crisp Topping
1 cup brown sugar
1 cup flour
½ cup chopped walnuts
½ cup quick cooking oats
½ cup butter, room temp
1 tsp cinnamon

Crust
Heat Oven to 350. Spray a 9X13 pan with cooking spray. In a medium bowl, mix flour and powdered sugar. Grate (just like you would shred cheese) frozen butter and mix it in with the flour mixture, with your fingers, until well combined (Or you can add all 3 ingredients to a food processor and mix well). Press into the bottom of the pan and bake for 15 minutes.

Cheesecake
In a large bowl, cream the cream cheese for about 1 minute then add the sugar and vanilla and mix until smooth. Add eggs one at a time mixing well between each add. Pour over the crust.

Apples
In another bowl, add chopped apples, sugar, cinnamon, and nutmeg. Spoon over cheesecake mixture.

Crisp Topping
I just use the empty apple bowl and add all the crisp ingredients and combine with a fork or my fingers. Sprinkle over the apples.

Bake 40-45 minutes. Refrigerate until completely cool.

Enjoy!

Warmly,
Mary

Thursday, October 6, 2011

Scotcharoo Bars


Do you believe in love at first sight? Well how about love at first bite? My little warrior came home from school today wanting peanut butter crispy treats with lots of chocolate on top. And you know me, I was happy to accommodate his request! We've talked about this before, right? Well if we haven't, we need to...the happiness that peanut butter and chocolate share!
Peanut butter and chocolate are like Prince William and Princess Kate! Romeo and Juliet! Scarlett O'Hara and Rhett Butler! Tristan and Isolde! Lancelot and Guinevere! They just go together!
These bars have crunchy chunky peanut butter and caramily (is that a word?) brown sugar instead of the standard white sugar. Topped off with butterscotch and chocolate! Yes, that's love!


SCOTCHAROO BARS
Ingredients
6 cups rice crispy cereal
1 cup chunky peanut butter
1 cup light corn syrup
1 cup brown sugar
2 tsp vanilla
1 1/2 cup semi-sweet chocolate chips
1 cup butterscotch chips

Butter or grease 9x13 baking dish. In a large saucepan combine the peanut butter, syrup and brown sugar. Stir over medium heat until all the ingredients are melted and well combined. Removed from heat and stir in the vanilla. Mix in the cereal until it is all nicely coated. Pour into the pan and spread out evenly.
In a microwaveable bowl combine both chips. Microwave for 1 minute. Stir and microwave for an additional 30 seconds. Continue this process until all the chips are melted. Pour and spread evenly over peanut butter bars.
Allow the chocolate to set before you cut them to serve and devour!  Enjoy!

Come join the fun at the My Baking Addiction and GoodLife Eats Holiday Recipe Swap sponsored by Scharffen Berger!

Tuesday, October 4, 2011

Triple Chocolate Cookie Dough Brownie


Who doesn't love brownies? Who doesn't love cookie dough? I know that in this home both of these are top choice! Oh and why is it that chocolate chip cookie dough might possibly taste better than the actual cookie? I was hoping that these would turn out as good as I had planned. They were! And I really hoping that I had plenty of friends to share them with to get them out of my kitchen. I did! Smooth, rich chocolate chip cookie dough....Fudgy, Chewy Brownies with even more chocolate chips! I hope you love chocolate as much as I do!
And what a perfect recipe to contribute for a Holiday Cookie Swap featuring CHOCOLATE! This is so much fun...My Baking Addiction and Good Life Eats are doing a Holiday Recipe Swap sponsored by Scharffen Berger. Have a good chocolate recipe? You should participate!
 

TRIPLE CHOCOLATE COOKIE DOUGH BROWNIE
Ingredients 

Brownie
12 oz semisweet chocolate or bittersweet chocolate, chopped
1 1/2 cup butter, cut in pieces
2 cups sugar
5 eggs
2 Tbl vanilla
1 3/4 cup flour
1/3 cup cocoa powder
1/2 tsp salt


Cookie Dough
1 1/2 cups  flour3/4 cup butter, room temp
1 cup brown sugar
1/2 cup granulated white sugar
3 Tbl milk
2 tsp vanilla extract

1 cup M&M's
1/2 cups semisweet chocolate chips

Chocolate Drizzle
1/2 cup semisweet chocolate chips
2 tsp shortening

Brownies: Heat oven to 350. Line a 9X13 baking dish with parchment paper or foil and grease.
In a microwaveable bowl, melt the chocolate and butter - in 30 second increments, stirring in between. Continue until melted and smooth, then set side.

In a medium bowl combine eggs, sugar and vanilla. Mix well and then slowly add the chocolate mixture in, stirring consistently. Combine flour, cocoa powder and salt and then fold into the chocolate mixture. Pour into the pan and bake for 35 - 40 minutes.

Cookie Dough: While the brownies are cooling, Let's whip up the cookie dough! In a medium bowl cream butter, sugars, milk and vanilla. Add the flour and mix well. Stir in M&M's and chocolate chips. Wait until the brownies are cooled and then spread over top.

Drizzle: Melt the chocolate chips in the microwave for 1 min. Stir in the shortening. Mix well. Drizzle over the top. Refrigerate before cutting. (I refrigerated the brownies, then cut and drizzled chocolate on each individual piece.)


Enjoy!

Warmly,
Mary

Wednesday, September 21, 2011

Chocolate Carmel Cheesecake


I don't know about you but I need a good laugh today! I've been on Facebook this today and they changed up a whole lotta stuff! I can't find my friends... Shoot...I can't even find myself on there! All this confusion (yes, I'm confused! I am so NOT good on computers!)...confusion and frustration...I NEED a good laugh! Whenever I need to laugh I remind myself of a story from this summer. This summer the Princess and the Warrior took swimming lessons and by the way they Rocked! The Warrior is a total athletic rock star! He's four and can swim in the deep end of the pool by himself! That's not the funny part. One day after swim lessons my little warrior said "mom, did you know my swim teachers name is Yoo-Hoo?" I thought that was an odd name, but responded "Really?". He Said "ya, because whenever I need help I say 'Yoo-Hoo, I need help!'" What a little comedian. Where he came up with that, I have no idea! I remind myself over and over of that story and the more I say it, the harder I laugh! Oh, I feel better! Facebook who? Ha!

If you have time, keep reading, we'll be talking about cheesecake! If not, then just look at the pictures and then come back later!
Ok, cheesecake! I'm going to be honest with you, I have never been one of those "I would die for cheesecake" kind if girls. Sure cheesecake is good, but there are a hundred other desserts I'd choose over cheesecake. Until now! I had this dessert in mind when we had some special guests over for dinner. They are a family that I really respect as well as laugh a ton with! Super neat family! I had to make this good! Ok, but back to the cheesecake. So, I'm not a huge Cheesecake lover but I do have an outstanding Pumpkin Cheesecake recipe that is "Out Of This World" and is a frequently requested dish over the holidays (I promise to share soon). I knew that if I could come up with just the right combination, it could create one rockn' dessert. I started out with making an Oreo crust. Ok, so I didn't have real Oreo's on hand but the all natural Trader Joe's version and I don't what in the world happened, but they were a total BOMB! NOT the bomb but A bomb! A disaster! I should have taken a picture! So, I started over...this time with an original Graham Cracker Crust. Next ingredient... caramel. Carmel whispers fall to me, so I wanted to incorporate a layer of creamy caramel...I just wasn't sure where yet. Chocolate cheesecake? No, basic cream cheese base...no sour cream or anything, just the good original stuff! Then I thought about a rich chocolate ganache topping. Perfect! All the elements of a rich, delicate, luxurious dessert!  I WILL make this again! And I will NOT change a thing! It came out absolutely perfect! It didn't even sink or crack...look! YAY!


See the chocolate and carmel oozing....yummy! I think they'll be back! :)

Sure wish I had better lighting for these pictures...hmmm...

Chocolate Carmel Cheesecake AKA the Best Cheesecake I have ever had in my whole life!
Ingredients
2 1/2 cups Graham Cracker crumbs (13 whole crackers)
1/2 cup butter, melted
1/3 cup sugar (for crust)
1 pkg caramels, unwrapped
1-5oz can evaporated milk
3-8oz pkg cream cheese, room temp
3 eggs, room temp
3/4 cup sugar (for cheesecake filling)
2 tsp vanilla
8 oz semi-sweet chocolate chips
1/2 cup heavy cream
2 Tbl butter

Heat oven to 350.  Combine graham cracker crumbs (I grind them in a blender), 1/3 cup sugar and butter. Mix well and press into the sides and bottom of an 8" spring-form pan.
Bake at 350 degrees for 8 minutes.
In a medium microwaveable glass bowl add unwrapped caramels and evaporated milk. Microwave for 90 seconds. Stir. Microwave for another 60 seconds. Stir. Continue now in 30 second increments until all the caramel is melted and you have a smooth creamy sauce. Reserve 1/4 cup for later and pour the rest onto the Graham cracker crust. Set in the freezer to set while you prepare the next step.
In a large mixing bowl, beat cream cheese, sugar and vanilla until completely smooth, but do not over mix. Add eggs, one at a time, beating well and scraping the sides and bottom of the bowl after each addition. Again, mix well but do NOT over mix.
Carefully spoon over the caramel.
Bake at 350 degrees for 10 minutes. Reduce heat to 325 and keep baking for an additional 45 minutes  or until filling is almost set. Turn the oven off but keep the cheesecake in there for 2- 3 hrs.
Remove from the oven and allow to continue to cool at room temperature. Now it's time to make the ganache topping.
Add chocolate chips and cream to a small microwaveable mixing bowl. Microwave for 1 minutes. Stir until melted. Add butter, cut in chunks. Stir until everything is melted and shiny. Pour over the top and allow to drip down the sides. Allow to set a bit then drizzle the remaining caramel over the top.
Chill in the fridge for at least 2 hours!


Enjoy and be completely satisfied!

Warmly,
Mary

Wednesday, September 14, 2011

Coffee Oreo Ice Cream


Good ole Nebraska! Monday it was 90 and today I think they are saying a high of 60 and it will probably get down in the 30's overnight. I thought if I want to try this ice cream recipe, I'd better do it now before it's too late!

Coffee Ice cream is pretty much my all time favorite ice cream! And Haagen Dazs is by far the best coffee ice cream in the world!  Add crunchy Oreo cookies and salty peanut butter...need I say more? Don't count calories on this one people, or carbs, or fat for that matter...just eat it and then go run 5 miles, or maybe 8!

Anyway, why is Haagen Dazs so stinking good? Evidently they add egg yolks to their recipe, which is why it boasts it's creamy goodness flavor. Don't see how eggs can make ice cream taste so good? Well, give it a try and I promise you will see!

Look at the bites of peanut butter, Oreo and the Oreo cream! MMM....


Enjoy My friends! Happy Last Day's of Summer!

Coffee Oreo Ice Cream 
Ingredients

1 1/2 cups Heavy Cream
2 cups whole Milk
3/4 cups sugar
2 Tbl instant coffee
5 egg yolks
10 Oreo Cookies, broken into big chunks
1/2 cup peanut butter

Beat egg yolks in a small bowl and set aside. Combine cream, milk, sugar and instant coffee in a medium saucepan and cook over medium heat until it's just about to boil, it will be steaming. Reduce the heat to medium-low and remove 1 cup of the cream and sugar mixture. Very slowly add the 1 cup to the egg yolks - make sure you go slow and whisk continually until it's well combined. Now pour the egg mixture into the the remaining cream and sugar mixture on the stove. Cook and stir constantly until it thickens and is custard-like. Remove from the heat and strain into a medium bowl. Set a sheet of plastic wrap directly on the mixture and refrigerate until it is cool.
Pour into the ice cream machine and freeze according to the manufacturers directions. When you're done "freezing" the ice cream, stir in the Oreo chunks and the peanut butter. Pour into a freezer-safe container and place in the freezer for a couple hours until the ice cream is hard or just until you're ready to indulge!


Warmly,
Mary

Monday, August 22, 2011

Peanut Butter Ice Cream with Reese's


Sitting by the lake, swimming at the pool, running through the sprinkler, long walks, bike rides, afternoons at the park, baseball in the yard with the kids, sidewalk chalk, cook-outs with friends and homemade ice cream! I love summer. When it's 110 with 95% humidity, you won't catch me complaining. Yes, hot chocolate, snuggling on the sofa watching movies, building snowmen and sledding are all nice, but personally, nothing beats summer! Ever since I was a tiny little girl barely toddling around, I remember our family making homemade ice cream. We made it at my Grandma and Grandpa Peterson's House and at my Grandma McCoy's House. Especially on the fourth of July! I remember my dad sitting there for an hour turning the hand help crank. Luckily for me, now I have n electric ice cream machine! My dad grew up making homemade ice cream, I grew up making homemade ice cream and now my kids are getting to enjoy homemade ice cream! It's my family's favorite summertime treat! It is rich, cream and worth the extra effort!

Peanut Butter Ice Cream


Ingredients
1 1/3 cups smooth peanut butter
1 1/4 cups sugar
2 cups whole milk
2 cups heavy cream
1 tsp vanilla
6 Reese's Peanut Butter Cups, roughly chopped (I used the holiday ones...they are just so much better than the regular!)

In a mixing bowl, cream peanut butter and sugar. Add milk and beat until smooth. Add cream and vanilla and mix until well combined.

Freeze in the ice cream maker according to the directions. When he ice cream is done, stir in the peanut butter cups and spoon ice cream into a freezable container. Freeze for a couple hours or eat!
If you haven't made ice cream before, I'll let you know that it's more like soft serve when it's done in the ice cream maker but will harden up in the freezer.


Enjoy the Goodness!

Warmly,
Mary

Friday, August 19, 2011

White Chocolate Krispie Treats!


Remember when you were a kid and you came home from school to freshly made gooey crunchy sweet rice crispy treats? Yum! I do! My mom made them perfectly soft and chewy too! Not hard and crumbly.

Well, my little princess and warrior are headed to Nana and Papa's for a few days and I wanted to send a little treat with them. One that wouldn't just get the kids excited but one that would be pleasing to the sophisticated palate as well! Marshmallows, white chocolate, peanut butter bits, dry roasted peanuts and chocolate covered peanuts! Holla! I can see it now, you are intrigued, but hesitant. Don't let the many ingredients intimidate you. This super simple recipe will make you the rock star of the party or class or house or office! Whatever or wherever! And if you don't have one or two of the extra goodies to add...no big deal. Leave it out or add something else...the possibilities are endless!


White Chocolate Krispie Treats


Ingredients
4 Tbl butter
1/2 c white chocolate chips, make sure they are good quality like Ghirardelli 
30 marshmallows
3 cups Rice Krispies
1/2 cup dry roasted peanuts
1/2 cup peanut butter chips
1/2 cup chocolate covered peanuts


Butter 9X13 baking dish. Melt the butter and white chocolate, over low heat in a large saucepan. . Add the marshmallows and stir constantly with the lowest heat setting. Be patient here people, trust me you don't want the marshmallows or chocolate to burn. When there are just a few little lumps of marshmallow left, remove from the heat and stir in the rice krispies. Now add the peanut butter chips and dry roasted peanuts. Finally, after letting some of the heat escape but still easy enough to work with, stir in the chocolate covered peanuts.  Dump into the buttered pan and spread your gooey goodness to the edges.

Enjoy and feel like a kid again!


Warmly,
Mary

Wednesday, August 3, 2011

Chocolate Chip Cookies


When Superman and I first met, he was living near the beaches of Virginia and I was living near the cornfields of Nebraska. We chatted on the phone...a lot. I think it was actually in our first, maybe second conversation ever that I learned about his love affair with Chocolate Chip Cookies. Being the confident baker that I was, I knew that when we would get to be together, I would woo him with my culinary expertise! Finally together, I had a chance to show him my skills! But every time I tried to impress him with yet another go at a new recipe, they were either too flat and crispy or too dry and hard. Still he could not resist and married me anyway! But every time I tried make cookies for him, epic fail! And to make things worse, when we were served perfect chocolate chip cookies somewhere and he swooned over them, I was crushed! I set out to find the perfect chocolate chip cookie... recipe and finally I succeeded! I was chatting with some friends from our little South Dakota church and a teacher friend offered her recipe. The optimistic but skeptic that I am, I hurriedly ran home to try them, it was Valentines Day and the cookies were what he should have, however I did have a back-up plan. I was pleasantly surprised that each and every cookie came out perfectly! Oh so perfectly, round, fluffy, chewy and flavorful! Needless to say, Superman was impressed and still to this day, he brags about MY cookies and has never had a wandering eye for another's cookies again! Now, years later if he gets to choose what I'll whip up that day, "Your regular chocolate chip recipe" every single time! And I feel honored every time to make perfect chocolate chip cookies for my superman!


Chocolate Chip Cookies (I don't know the origin of this recipe, I received it from a friend)


Ingredients
1 cup butter, room temp
1/4 cup sugar
3/4 cup brown sugar
2 eggs
1 tsp vanilla
2 1/4 cup flour
1 tsp baking soda
1 pkg (the smaller size) Vanilla Instant Pudding
1 pkg semi-sweet chocolate chips

Heat oven to 375. Beat butter, sugars, eggs and vanilla on medium speed until light and fluffy. Mix in flour, baking soda and pudding mix. Stir in chocolate chips. Drop teaspoonfuls (I use a cookie scoop) onto ungreased cookie sheet.  Bake 10 minutes or until golden brown. Cool on wire racks.


Enjoy with a tall glass of milk! Gotta go, I have a milk and cookies date with Superman!

Warmly,
Mary

Friday, July 8, 2011

White Chocolate French Vanilla Peach Cake


I know! Why can't I just leave well enough alone! I am sure that French Vanilla Cake would be lovely! I am also sure that peach cake would be sweet and refreshing! And I know that white chocolate cake and frosting would be yummy! But put the three amazing flavors together and you get something that you absolutely can not resist! Plus it's a super easy recipe my friends! In fact, looking back, I can't take credit for this recipe at all, looks like the princess and the warrior made the whole thing! Oh well! And looking back, I think that I use the !exclamation mark! too much!!!! Sorry, it's just me!


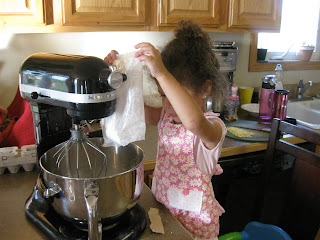
first the eggs

super easy, a cake mix and a box of instant pudding!

a cup of milk

add the pudding

add the flour, sugar and some other pre-measured stuff

now the oil

mmm...white chocolate

before...

...after


White Chocolate French Vanilla Peach Cake

Ingredients

1 box Vanilla Cake mix
1 pkg French Vanilla instant pudding
1 cup milk
1/2 cup sour cream
1 cup oil
4 eggs
2 tsp vanilla
3 oz good quality white chocolate, chopped into small pieces


Filling
1 large can Peach slices, juice drained and peaches cut into small chunks (reserving several slices if you choose, for the top of the cake)

White Chocolate Frosting

Ingredients
1 cup butter, room temp
1 cup heavy whipping cream
4 cups powdered sugar
2 tsp vanilla
4 oz white chocolate

Heat oven to 350. In a large mixing bowl, beat the eggs with an electric mixer very well. Add all the rest of the cake ingredients except the white chocolate, and beat with the mixer for 2 minutes. Now stir in the white chocolate pieces.

Line a jelly roll pan with parchment paper. Or grease a regular cake pan (if you choose not to do the triple layer like I did). Pour the cake batter into the pan and bake for 15 - 20 min (for baking in a jelly roll pan). When done, remove from the oven and cool completely.

While the cake is cooling let's make the frosting! Melt the white chocolate in a microwavable bowl for 30 second increments, stirring after each time. In a large mixing bowl cream the butter with an electric mixer for about one minute. Add the whipping cream and vanilla and beat for another minute. Add the white chocolate and sugar and mix for 2 minutes, it will look fluffy and lovely!

Mix 1 cup of the frosting and the peach chunks together in a bowl.
Cut the cake into 3 equal pieces. Set the first layer on a serving plate or platter. Spread 1/2 of the mixture on top of the first layer of cake. Set the second layer on top and spread the remaining peach mixture on that layer. Top with final layer of cake. Frost the sides and top with the remaining frosting. Use the remaining peach slices to garnish the top if you choose.

Enjoy this lovely bright and refreshing cake! Didn't the kids do an amazing job! I am so proud! They will each make someone very happy one day!

Warmly,
Mary