Remember back in June when I made tamales for the first time? They were so good! So good in fact that I couldn't wait for a chance to make them again! Inspired by one of my favorite food...jalapeno poppers. You know, jalapeno's stuffed with cream cheese. I like things hot! I like spicy food and I like summertime...all things hot! The jalapeno cream cheese tamales could not have turned out any better! I took them to an event with friends and they were a big hit! I took them to another event with family and between these and the meat filled ones, these were the more popular. Now, they do have a kick to them, because I use the seeds and everything, but if you don't want them so hot, scrape out the inside of the pepper and just use the outer green part. USE GLOVES! Tamales are time consuming to make, so I'm going to get going here...so you can get your cook on!
Jalapeno Cream Cheese Tamales (5 Parts)
1. Soak Corn Husks
Soak the corn husks for 2 hours. This recipe made about 15 tamales, so you won't need the whole package, but soak more than 15 in case you rip some or some are too small.
2. Mesa Dough
3 c masa flour
1 Tbl chili powder
1 Tbl garlic powder
2 tsp paprika
2 tsp salt (I didn't, but I know you will)
3/4 cup corn oil
2 cup reserved broth from the meat (or canned, if you didn't save the good juices or didn't roast your own meat)
Warm up the broth in the microwave for about a minute...it doesn't have to be hot hot (I don't think, mine wasn't).
Mix masa flour and all the seasonings. Add the oil and 1/2 c of meat broth at a time until you get to a peanut butter consistency. Stir as you add the broth. I used 1 1/2 cup of the broth and then halfway through added another 1/2 cup because the dough seemed to be getting dry. Set aside.
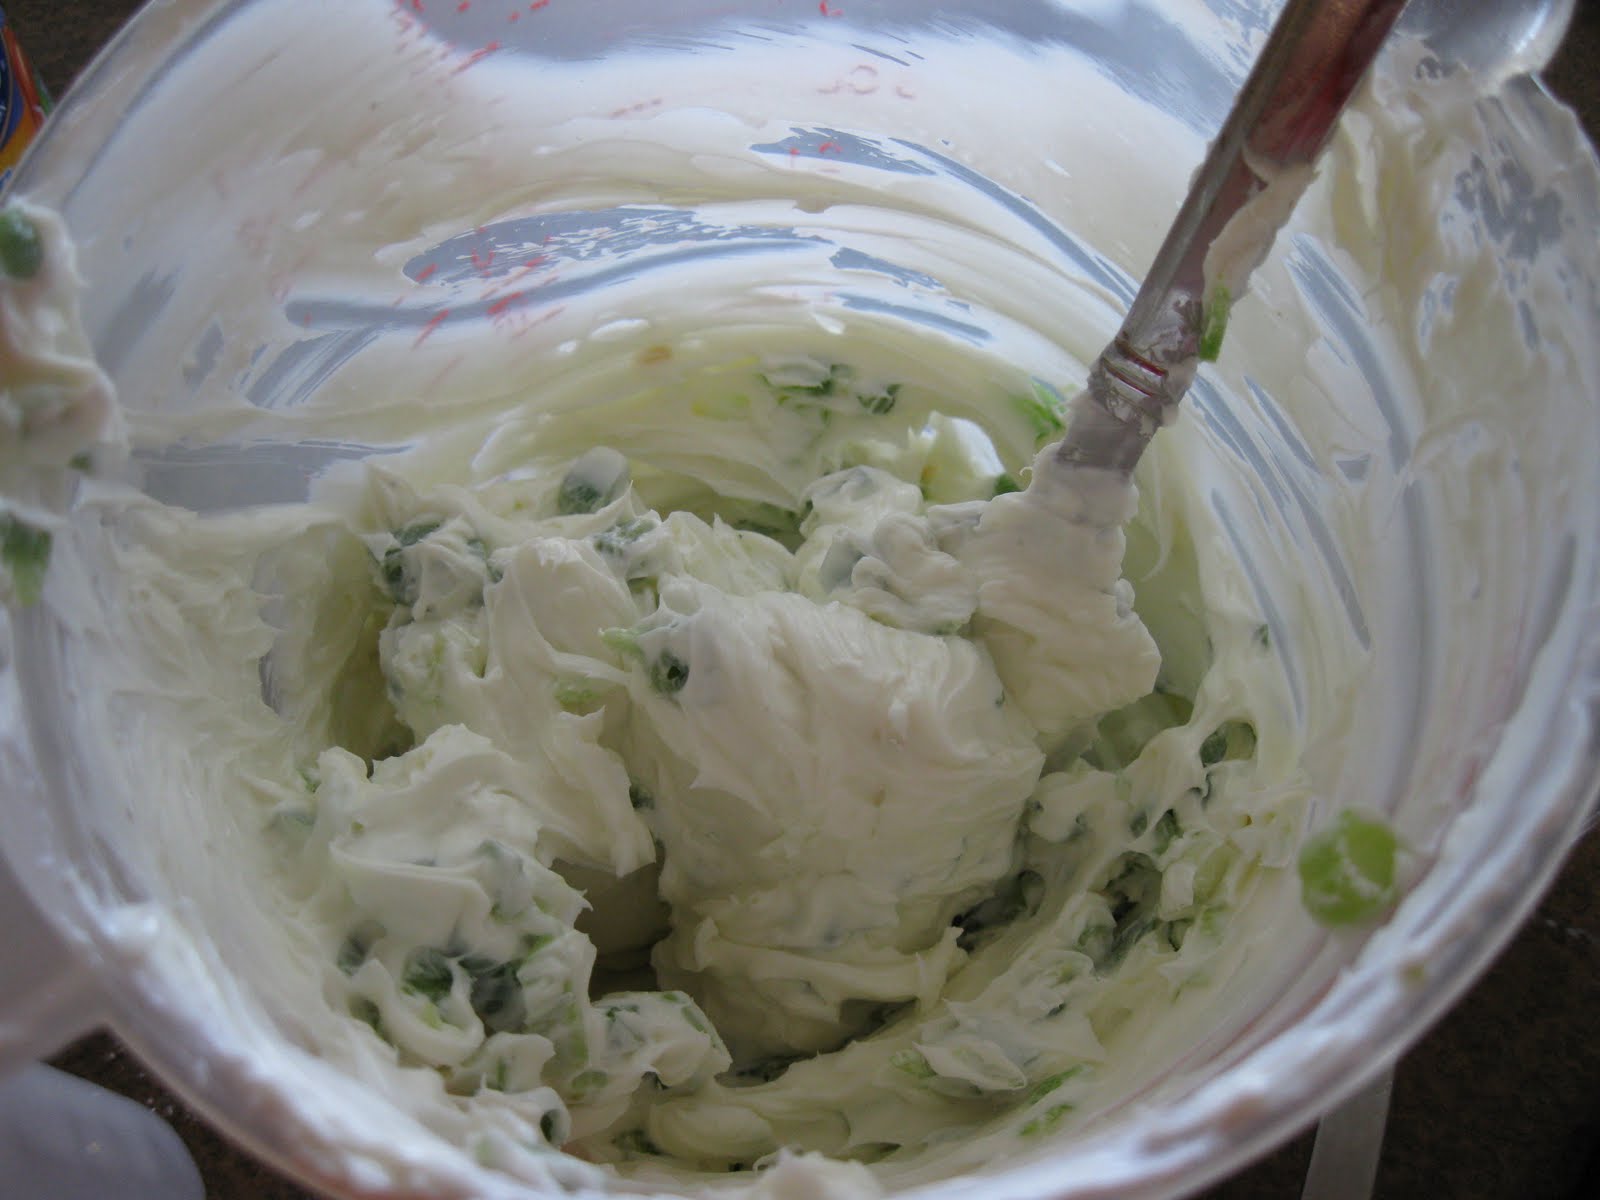
3. Cream Cheese Filling
2 8 oz pkg cream cheese, softened
2 jalapeno (I will actually use 3 next time, but if you're a light weight, one is plenty!)
4 green onions
Slice the green onions, set aside in a mixing bowl. With gloves on, chop the whole jalapeno, except the stem. Mix all three ingredients together well.
4. Assemble Tamales
After soaking the husks and all the other ingredients are ready, it's time to roll 'em up! Lay one corn husk down at a time on your working surface, with the wider end closer to you. Measure just shy of 1/3 c of the dough onto the husk and with your fingers spread the dough out onto the edge of the left side going a little more than halfway towards the right side of the husk and about 2/3 of the way up. Lay a heaping tablespoon of the cream cheese filling in the center of the spread out dough. Beginning on the left, roll all the way to the right. I lifted the husk off the dough a little bit as I rolled tightly so that it didn't get tucked into the dough. Now fold the short end piece of the husk, over to close it up. You will have one narrow end closed and one wider end open.
5. Steam Cooking the Tamales
After you get all the tamales stuffed and rolled, you will need too cook them in a medium saucepan, with a steamer on the bottom, so that the tamales will not touch the water on the bottom. If you have a large pan with metal colander, that would work too. Pour a couple inches deep of water in the pan and then set the tamales in standing up, folded end down, onto the steamer separating them from the water. Once all the Tamales are in, put the lid on and turn stove on medium heat. Once the water begins to boil, turn on medium low and cook for a full 2 hours. Check the water every 30 minutes or so to make sure it doesn't go dry. Add water if it gets low, don't burn yourself on the steam. After 2 hours your little tamales are done. Remove them from the pot. You can choose to eat them or freeze them.
Now That's Good Food! Enjoy!
Warmly,
Mary
Directions Without Pictures
Jalapeno Cream Cheese Tamales (5 Parts)
1. Soak Corn Husks
Soak the corn husks for 2 hours. This recipe made about 15 tamales, so you won't need the whole package, but soak more than 15 in case you rip some or some are too small.
2. Mesa Dough
3 c masa flour
1 Tbl chili powder
1 Tbl garlic powder
2 tsp paprika
2 tsp salt (I didn't, but I know you will)
3/4 cup corn oil
2 cup reserved broth from the meat (or canned, if you didn't save the good juices or didn't roast your own meat)
Warm up the broth in the microwave for about a minute...it doesn't have to be hot hot (I don't think, mine wasn't).
Mix masa flour and all the seasonings. Add the oil and 1/2 c of meat broth at a time until you get to a peanut butter consistency. Stir as you add the broth. I used 1 1/2 cup of the broth and then halfway through added another 1/2 cup because the dough seemed to be getting dry. Set aside.
3. Cream Cheese Filling
2 8 oz pkg cream cheese, softened
2 jalapeno (I will actually use 3 next time, but if you're a light weight, one is plenty!)
4 green onions
Slice the green onions, set aside in a mixing bowl. With gloves on, chop the whole jalapeno, except the stem. Mix all three ingredients together well.
5. Steam Cooking the Tamales
After you get all the tamales stuffed and rolled, you will need too cook them in a medium saucepan, with a steamer on the bottom, so that the tamales will not touch the water on the bottom. If you have a large pan with metal colander, that would work too. Pour a couple inches deep of water in the pan and then set the tamales in standing up, folded end down, onto the steamer separating them from the water. Once all the Tamales are in, put the lid on and turn stove on medium heat. Once the water begins to boil, turn on medium low and cook for a full 2 hours. Check the water every 30 minutes or so to make sure it doesn't go dry. Add water if it gets low, don't burn yourself on the steam. After 2 hours your little tamales are done. Remove them from the pot. You can choose to eat them or freeze them.