Thursday, June 30, 2011

Freezer Meals...my way! Part 1


When you think of roasted turkey you probably think of Thanksgiving or Christmas. So this recipe kind of comes at an odd time of year. But there is so much more to roasted turkey than paring it with mashed potatoes and cranberry sauce. This healthy food item is crucial to a lot of really good recipes and let me explain why! So you have a 10 lb bird or a smaller chicken OR a BIGGER turkey. You flavor it while it's roasting, which is something that you're not going to get from a can or a bag package of just plain chicken breasts. When it's done, freeze the meat in nice and tidy 1lb packages and you have a lotta meat to use for awesome dinners...like the ones I'll be sharing with you (just scroll down to the bottom of this post to take a look). Plus you can freeze all the yummy turkey or chicken juices in 1 cup servings and pull it out whenever you need some broth. Again, the canned stuff can't touch this! So give it a chance. You won't be sorry that you did! It may take a little time, but it is super easy. I couldn't keep my kids mouths fed fast enough while I was working with this flavorful meat!
WARNING: Do NOT try if you like tasteless dry meat!


little birdies waiting for another bite!

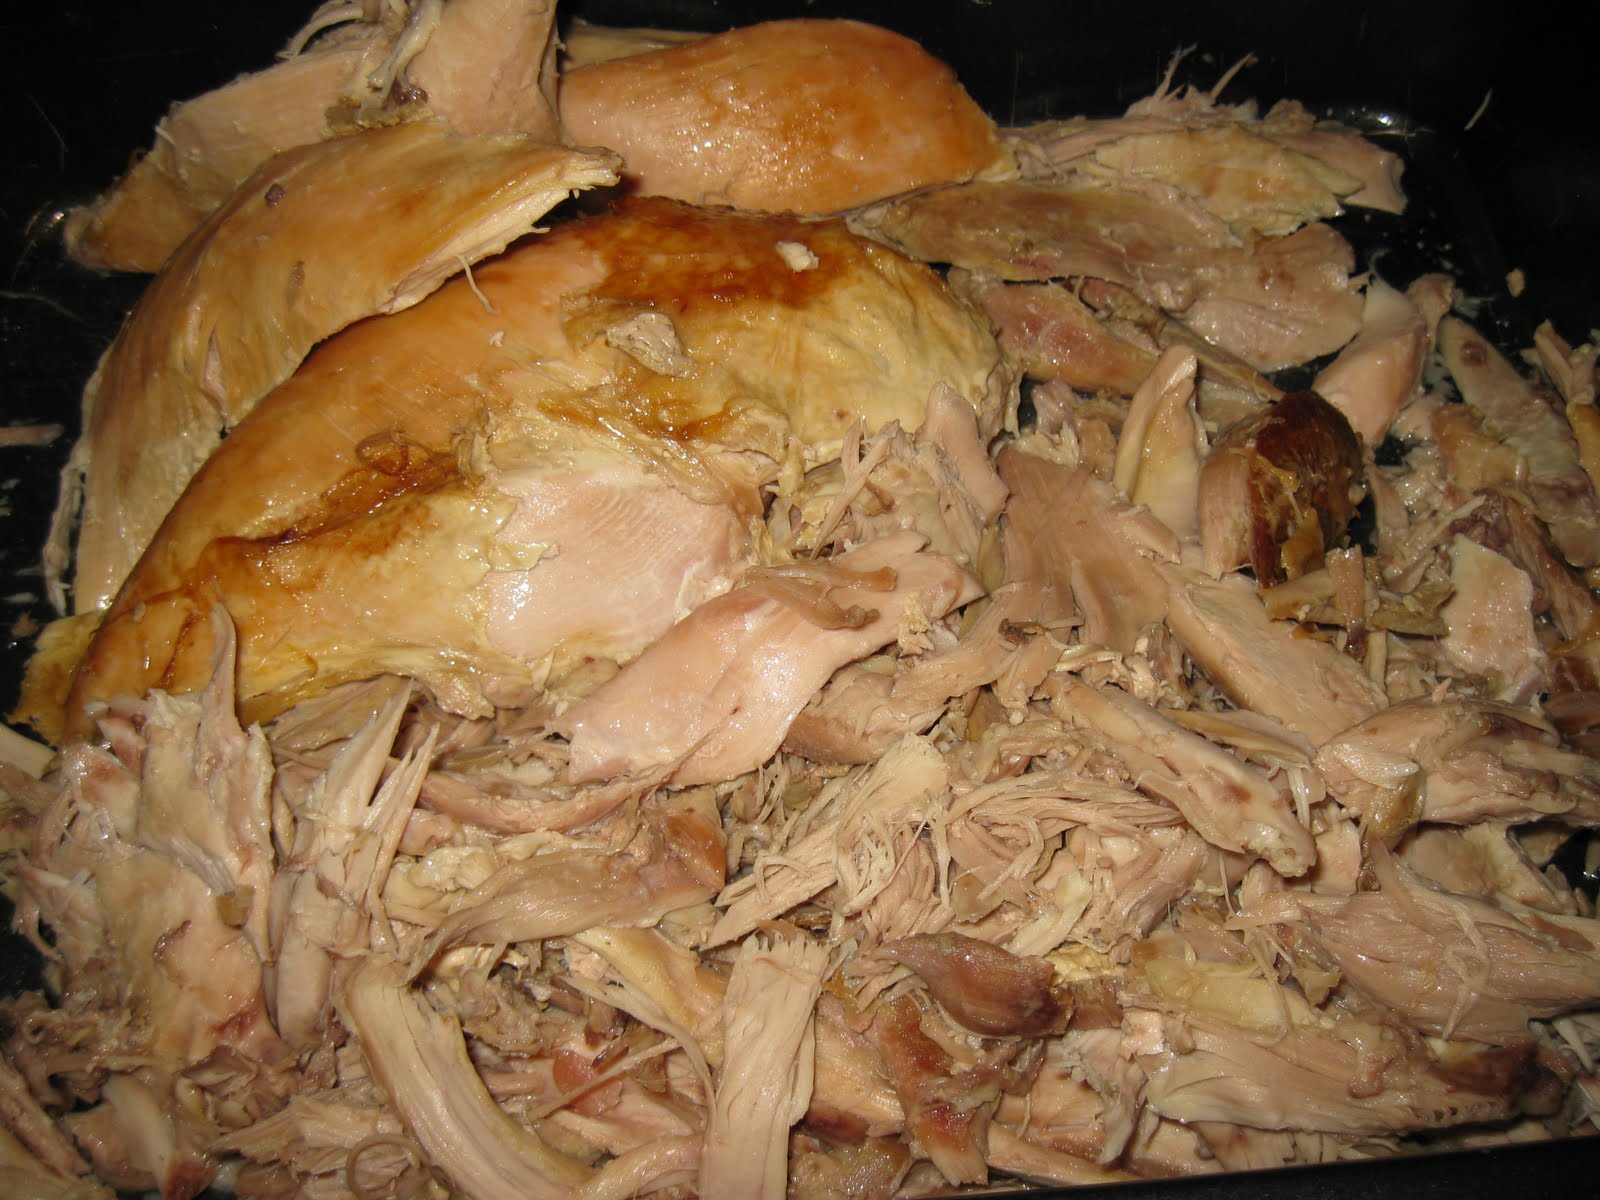
So tender and juicy it just falls off the bone!


Roasted Turkey or Chicken


Ingredients
1 whole Turkey or Chicken (any size)
1 white or yellow onion (1/2 if roasting a chicken)
2 celery stalks, cut into 3 or 4" pieces
1 garlic bulb, 1/2" of the end cut off
2 bay leaves
1 Reynolds Oven bag (found near the foil in the grocery store)
Quart sized freezer bags

Heat the oven to 350. Open the oven bag and set it in a large roasting pan. Set the turkey or chicken in the bag, in the pan with the open end of the bird (it's bottom) facing the opening of the bag. Now stuff the onion, celery, garlic and bay leaves inside the bird. Close the bag up with the tie enclosed in the oven bag package.  Follow roasting directions, also included in the package, according to the size bird, but generally speaking it's 20 min per lb.

When your turkey or chicken is done, remove it from the oven and set it on the counter for about an hour, still in the bag. After an hour it should be cool enough to work with. Now I get 4 large bowls out, one for white meat, one for dark meat, one for the broth and one for discarded pieces. You do what works best for you.

For the Broth: Ok, this is how I get my broth, it works great for me but you should be careful and do what works for you. Untie the bag and bring the bag opening to the corner end of the pan, pulling it over the edge a little bit. Lift the pan over the bowl for the broth and carefully pour all the good juices in the bowl. Like I said, you do what works for you. But you really want this broth I promise! I've got up to 6 cups of broth before! You can use it for soup, rice, casseroles, my tamales...the possibilities are endless! Measure out 1 cup portions of the broth into freezer bags and freeze!

For the Meat: Bring your 3 bowls close to you in your work space and either remove the bird from the bag or cut open the bag to expose the whole turkey. I choose the later because this beast is so tender that it completely falls apart when you touch it (that's why I haven't found it beneficial to remove the meat to retrieve the broth). I usually just use my fingers and remove both of the entire breasts first and slice or dice on a cutting board and put them in separate freezer bags. Then I put the white meat in one bowl and the dark meat in a separate bowl because I use different pieces for different recipes, but if you don't care, you can put all the meat in one bowl. Continue to work, removing all the meat, discarding all skin, bones, fat, and other junk, until you have removed all the meat. Now separate into freezer bags and label. I do 1 lb bags. But you could do 1 cup or whatever works for your family. 

Taste a little bit...or a lotta bit...go ahead...it's good huh?! Okay, since it's already made, you might as well have some for dinner!

Use it in Turkey Pot Pie...

...or Creamy Chicken Soup

...or Southwest Chicken Roll-Ups
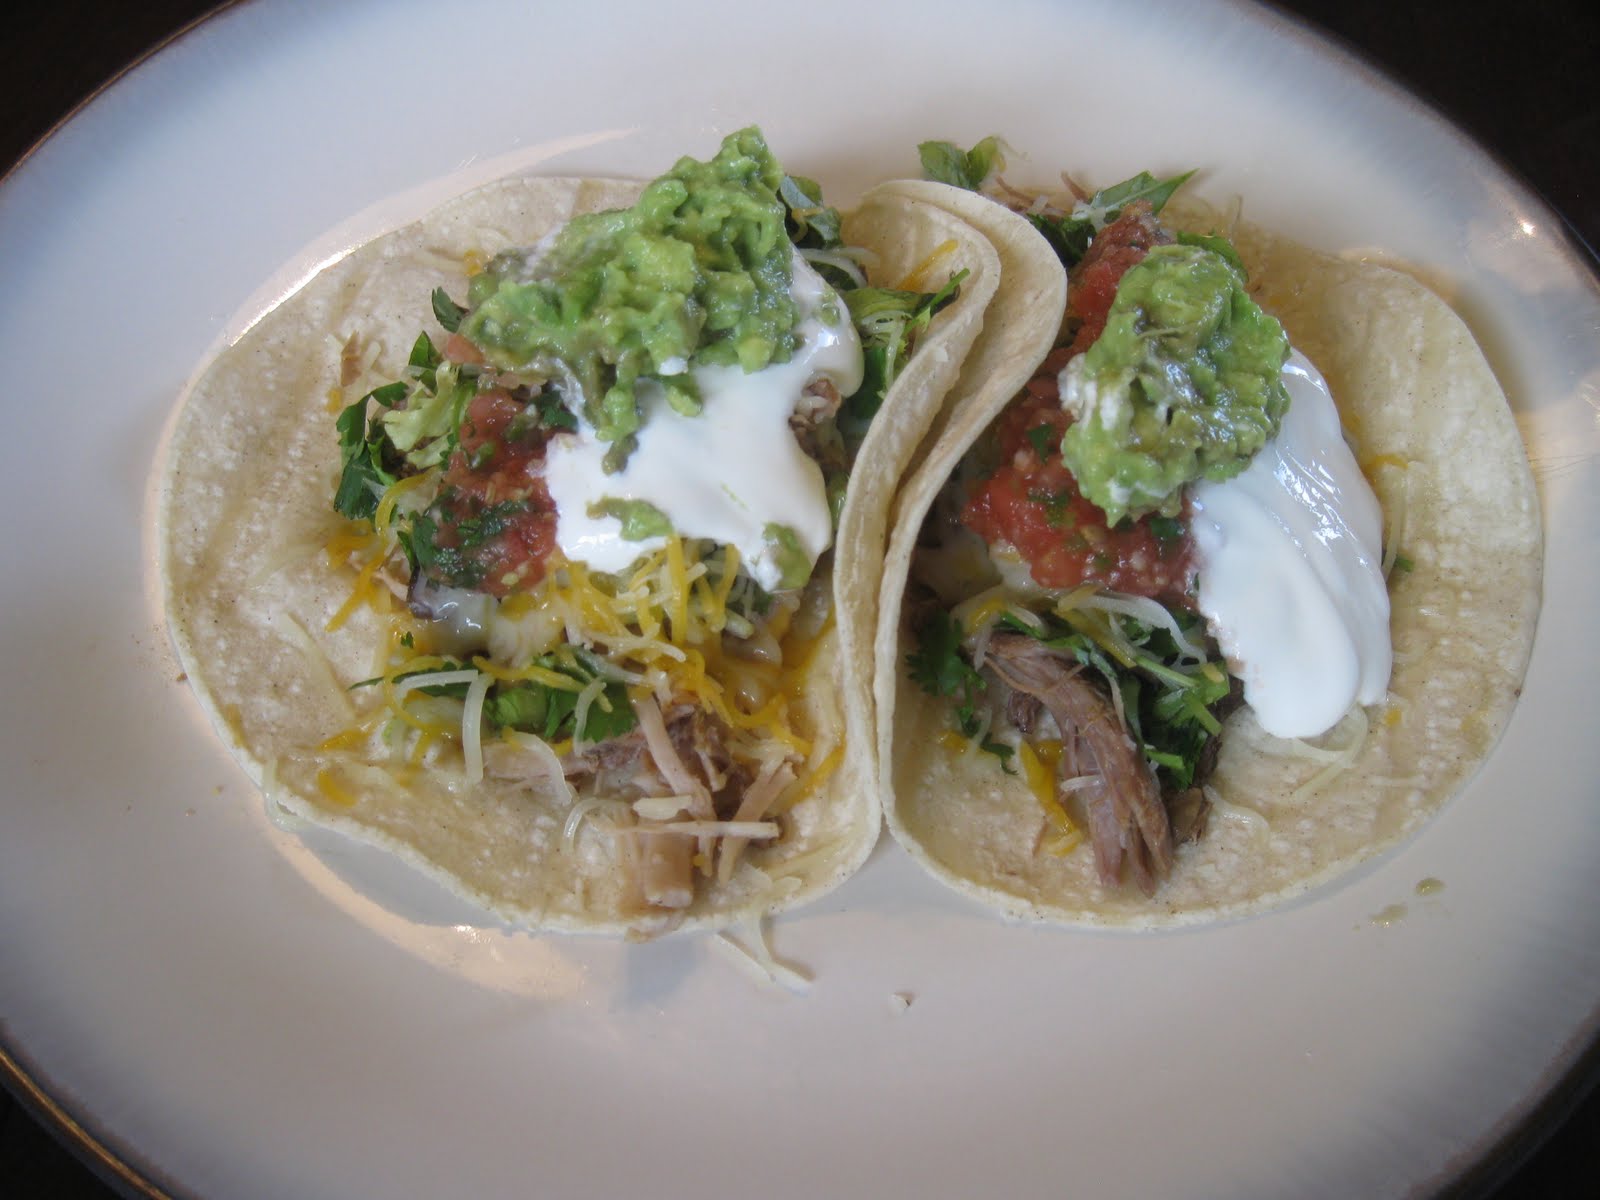
...or Carnitas

...or Chicken Pot Pie

...or Tamales...

...or Buffalo Chicken Pizza

...or Chicken Enchiladas...


All these recipes to use up this meat is soon to come! But you can start with these two...replace the pork in the Carnitas Here and for the Tamales Here with your poultry choice! Enjoy!

Warmly,
Mary

Tuesday, June 28, 2011

Strawberry Spinach Salad


You know what's funny to me? You request a healthy recipe but what are the chances that you make one of my healthy dishes over one of my decadent desserts? Ha, not likely! You know that I'm right! Until now...because this colorful salad is bursting with flavor! It's sweet and salty. Creamy and Crunchy! This salad is super tasty! I really hope you do make it. I do almost once a week!

Strawberry Spinach Salad

Ingredients

6 cups baby spinach
2 cups sliced strawberries
1 cup feta cheese crumbles
2 handfuls walnut halves, chopped if you want

Dressing Suggestions: I just squeeze the juice of one fresh lemon on top and I'm happy. But for a more luxurious (but so not healthy) option, go for the poppy seed dressing. 

Divide the spinach into 4 salad bowls. Top each one evenly with the strawberries, feta cheese and walnuts. Drizzle on the lemon juice or dressing. 


Enjoy!

Warmly,
Mary

Sunday, June 26, 2011

Amazing Oreo Brownies

Oh yes, and I drizzled white chocolate over some of them


Hi friends! Oh boy do I have a lovely gift for you! If only you could have joined the group of friends we had over last weekend for a BBQ so that you too could have been momentarily high off the amazing richness of the Oreo brownies I made. It all started with the Strawberry Cheesecakes with Golden Oreo Crust that I made for the princess's birthday party. I felt bad that I had left out the chocolate counterpart to the golden Oreo.  I know, it sounds crazy, but I am fair like that. If you HAD to choose between the original chocolate Oreo or the newer Golden Oreo, what would you pick? Well, it's a good thing you don't have to pick! People, these are amazing...you gotta make them! Oreos in the Brownie, Oreos in the frosting filling and Oreos to top it off!


the bigger the chunks the better

check out those layers

Hello Lovely


Amazing Oreo Brownies

Ingredients
1 box of your favorite fudgy brownies (plus ingredients to make it) OR your favorite recipe (I used these Fudgy, Chewy, Cakey Brownie from My Baking Addiction and they were so amazing they were worth the extra work)
24 Oreos, divided
1/4 c butter, room temp
1/4 c shortening
1 tsp vanilla
1 c heavy whipping cream
3 c powdered sugar

Line an 8 X 8 pan with foil or parchment paper. Prepare and bake the brownie mix according to directions. Cut 8 of the Oreos into quarters and lay on the bottom of the lined pan. Pour the brownie batter on top and bake. Make sure you leave the brownies a little fudgy, don't over cook them. When it's done, let them cool nicely on the counter or if you're like me, throw the pan in the freezer. 

Now let's make the heavenly frosting. With an electric mixer cream the butter and shortening. Add the vanilla and whipping cream and again, with the mixer, beat for 2 minutes until light and fluffy. Add the powdered sugar and mix for another 2 minutes, scraping the sides to make sure everything is mixed well. Quarter 8 more Oreos and fold into the frosting. Get the brownies out of the freezer and dump the whole thing over the cooled brownies and spread evenly.  Quarter the remaining Oreos and sprinkle them on top. 

Some how the frosting tastes just like the Oreo middle! Get your eat on! Enjoy!

Warmly,
Mary

Friday, June 24, 2011

Something Simple


OK, so I know what it's like...you're running around like crazy, you have people yapping in your ear, you haven't had a chance to sit down in 13 hours, you've warmed up your coffee six times today in hopes of having a sip and it remains untouched in the microwave, you've not had a quiet moment to yourself since you were sound asleep, but you're expected to make a tasty dinner tonight. Are you kidding? The dishes haven't even been done from last night's dinner. In fact you're wondering why you are taking 5 minutes to actually read skim through this blog. See, I do know what you're going through! Well, you still don't need to resort to the Golden Arches! Maybe Runza...only because I'm a Nebraska girl, but no seriously, you CAN fix a healthy tasty meal for the family in no time!

Simple Southwestern Pasta

Ingredients
1 lb ground beef
1 c salsa or 1 can diced tomatoes with chilies (more or less to your taste)
1 can tomato sauce
1 box Pasta (any will do, I used whole wheat shells)
2 c cheddar cheese, shredded
2 avocados, chopped (optional but so encouraged)

In a skillet brown the beef. In a large pot, boil the water and cook the pasta. Once the meat is done, set it aside. Once the pasta is done, drain the water and return the pasta in the pot to the stove, reduce the heat to low. Add the meat, salsa, and tomato sauce. Heat until everything is nice and hot. Spoon up into bowls, top with the cheese and avocado!

Happy Dinner! You won't believe how amazing the avocados taste on the warm pasta! Oh ya!


Warmly,
Mary

Thursday, June 23, 2011

Naturally, I'm a Cornhusker. So, I husked some Tamales!


So, if you read my post about Carnitas (which I'm sure you have because you follow my blog religiously and you haven't missed a post yet, but if for some weird reason you haven't, then you can totally check it out now) anyway, you'd know that I love me some Mexican food! Especially tamales! And in my travels I have had some amazing ethnic foods...have I mentioned the Cuban food from Miami...HELLO! But that's for another time. So, I have always wanted to experiment with tamales but have been too intimidated by failure. Then I realized that was silly because I'm not intimidated by much and I can really cook my butt off, so I'm going to try it. And seriously it wasn't hard. Very time consuming but not hard at all. And a lot of the time was just waiting. I finally finished them at about 9:30 last night and it was killing me because I couldn't try one that late, I have a girlish figure that I have to think about...so guess what we had for breakfast this morning. Yes, Tamales with Green Chile Sauce! They turned out perfect! I can't wait to make another batch, next time with cream cheese and jalapenos! Oh ya! The corn dough on the outside and the meat on the inside and the flavorful sauce over top! Yum!

Note: Since I have never made tamales before and didn't have any idea where to start for creating my own recipe, my resource was www.sonofthesouth.net. My recipe is adapted from theirs.

Read the entire process before you begin, it will help! I promise!


Perfect Tamales with Green Chili Sauce

There are 3 basic parts to this dish...so don't get overwhelmed...

Meat Filling


Ingredients
3 c (less than 1 lb) slow roasted shredded pork, beef or chicken  
***see below note for roasting suggestion                            
2 Tbl chili powder
1 Tbl garlic powder (next time I will use 6 fresh garlic cloves, minced)
1 Tbl cumin

After roasting the meat, shred the meat into small pieces, add the spices and mix well. Cover and place in the refrigerator.

RESERVE THE JUICE FROM THE MEAT FOR MASA DOUGH!!

*** Either the day before or first thing in the morning I would take a roast or whole chicken and place in a crockpot on low. Add a sliced onion and a few cloves of garlic. Roast for several hours depending on how much meat you're cooking. With the left over meat, you can save for another meal or freeze it for later.

Masa Dough


Ingredients
3 c masa flour
1 Tbl chili powder
1 Tbl garlic powder
2 tsp paprika
2 tsp salt (I didn't, but I know you will)
3/4 c corn oil
2 c reserved broth from the meat (or canned, if you didn't save the good juices or didn't roast your own meat)

Warm up the broth in the microwave for about a minute...it doesn't have to be hot hot (I don't think, mine wasn't).

Mix masa flour and all the seasonings. Add the oil and 1/2 c of meat broth at a time until you get to a peanut butter consistency. Stir as you add the broth. I used 1 1/2 c of the broth and then halfway through added another 1/2 c because the dough seemed to be getting dry.


Assembling the Tamales (sorry I just realized I didn't get any pictures of this process)

1 pkg Corn Husks (I found these in the produce section of the store)


Soak the corn husks for 2 hours. This recipe made about 15 tamales, so you won't need the whole package, but soak more than 15 in case you rip some or some are too small.

After soaking the husks and all the other ingredients are ready, it's time to roll 'em up! Lay one corn husk down at a time on your working surface, with the wider end closer to you. Measure just shy of 1/3 c of the dough onto the husk and with your fingers spread the dough out onto the edge of the left side going a little more than halfway towards the right side of the husk and about 2/3 of the way up. Lay a heaping tablespoon of the meat mixture in the center of the spread out dough. Beginning on the left, roll all the way to the right. I lifted the husk off the dough a little bit as I rolled tightly so that it didn't get tucked into the dough. Now fold the short end piece of the husk, over to close it up. You will have one narrow end closed and one wider end open.

After you get all the tamales stuffed and rolled, you will need too cook them in a medium saucepan, with a steamer on the bottom, so that the tamales will not touch the water on the bottom. If you have a large pan with metal colander, that would work too. Pour a couple inches deep of water in the pan and then set the tamales in standing up, folded end down, onto the steamer separating them from the water. Once all the Tamales are in, put the lid on and turn stove on medium heat. Once the water begins to boil, turn on medium low and cook for a full 2 hours. Check the water every 30 minutes or so to make sure it doesn't go dry. Add water if it gets low, don't burn yourself on the steam. After 2 hours your little tamales are done. Remove them from the pot. You can choose to eat them or freeze them. 

before

after


Green Chili Sauce

Ingredients
2 Tbl butter
2 Tbl flour
1 c milk
1 c sour cream
2 - 7oz cans chopped green chilies

In a saucepan on medium heat cook butter and flour until it turns a light golden brown, just a couple of minutes. Slowly whisk in the milk so that there are no lumps. Whisk in the sour cream and finally stir in the chilies.

Serve with the cooked tamales. You did it! See it wasn't that bad. It probably took me longer to write up the directions than it did to actually make them! Be super proud of yourself and enjoy a plate of the fruits of your labor!


Warmly,
Mary

Wednesday, June 22, 2011

Fresh Guacamole!


I am so excited! I finally got the nerve up to make homemade Tamales! I am working on therm as we speak...errr as I type! So as a wonderful encore to that success of taking the plunge, I am sharing with you the wonderful world of green! One of my all time favorite snack foods, EVER! Guacamole! This is super simple and super healthy! It is so delicious that you might not think that it's healthy, but the fat in the avocado actually breaks down the unhealthy fat in your body...I mean how fabulous is that! Just keep the salt and junk out of your gauc...and make it fresh people...there really is no other way! My kids eat the stuff...they would eat it every day...they request it! And it is so versatile, it's not just for tortilla chips, you know! Ok, well I gotta go, I have tamales to make! 


Guacamole


Ingredients
4 ish avocados, mashed (depends on how many people you're going to share with!)
2 roma or a couple handfuls of grape tomatoes, chopped
1/4 red onion, diced
2 garlic cloves, minced
handful cilantro, chopped (optional)
pinch of cayenne pepper (optional)
squirt of lemon juice

Add all of the ingredients together in a bowl, mix it around and enjoy! Adjust individual ingredients to your liking...See, super easy! Or if you made my Salsa here, then you can just add a couple of spoonfuls of that to the mashed avocado!

Serving suggestions: 1/2 an avocado per person

Warmly,
Mary

Monday, June 20, 2011

Peanut-Butter Filled Chocolate Cupcakes with Chocolate Ganache


You have to try these absolutely wonderfully peanut-buttery chocolatey....

...Oh man, do you ever think of something perfectly witty to say, but get distracted and forget what it was? I do that all the time! Last week I had the most luxurious manicure and pedicure. Yep, I sure did! I was awesome! A four year old little warrior painted my toes (yes, most of the polish was on the toes themselves and not the nails) and a three year old princess painted my finger nails (she did manage to get most of it on the nails, it’s a girl thing!). Oh yes, the warrior had picked out a purple glitter polish for the princess’s birthday gift and after he painted her fingernails and toenails, it of course was mommy’s turn!

So anyway, I totally forgot what I was going to tell you about these totally yummy Peanut-Butter Filled  Chocolate Cupcakes with Chocolate Ganache  because I was distracted by the idea of removing evidence of what was left of my week old manicure. By the time I returned to my computer with my fresh glass of ice tea and bowl full of strawberries to snack on, I was lost. Sorry!

Anyway, reading my ramblings will be totally worth it once you make these heavenly treats! I made these for my birthday (along with the White chocolate cream cheese frosting with 4berry filling - I feel like people need options in life!) Since they were such a hit I just HAD to share them with a whole new audience! All I have to say about them is OH MY!! I have been getting phone calls, emails and texts from the friends who were among the privileged to enjoy!

I know, Horrible picture, but you get the point...I hope!


Peanut-Butter Filled  Chocolate Cupcakes with Chocolate Ganache

Choose your favorite Chocolate Cake recipe. I use my own that you can find here  The Very Best Chocolate Cake
 
Peanut Butter Cream Cheese Filling
Ingredients
8 oz cream cheese, room temp
1 1/4 c peanut butter
1/3 c butter, room temp
3-4 cups powdered sugar
1 tsp vanilla
2 Tbl brown sugar

In a large bowl use an electric mixer to beat the cream cheese, peanut butter and butter together until creamy. Add the vanilla and brown sugar then add the powdered sugar one cup at a time until you have the desired consistency (3 cups is perfect to me), using the mixer to incorporate it in. Set aside. 

Chocolate Ganache
Ingredients
6 ounces milk chocolate chips
6 ounces semisweet chocolate chips
½ c heavy cream
2 TBL butter, cut into pieces

Add choc chips and cream to a microwave safe bowl. Microwave in 30 sec intervals. Stirring in between. Usually takes me 1 min 30 sec. Make sure to stir occasionally until fully melted. Once melted, add in the butter pieces. Whisk until it is very well incorporated and your chocolate ganache is smooth and shiny! (assembly instructions below)

See the manicure?


I do not have giant hands, these are the mini-cupcakes! ;)
Now Put It All Together

Now that you have made your cupcakes, the filling, and the ganache, it's time for the fun part! I just use a sharp knife and cut a cone shape out of each cupcake and fill that baby up with the Peanut Butter Filling. Pack it in there, don't be shy! You can set aside the cake scraps to make cake balls if you want...that's what I do! Anyway, fill up all your cupcakes then you can top them one of two ways. Take a spoon and spoon the ganache on top or you can do what I do and grab the cupcake by the base and dip and twist it in the gananche. Once again, don't be shy, the chocolate may get on your fingers, but oh well...it's just chocolate. Then voila perfect cupcakes every time!

can you see them there, between the ladybug cupcakes and strawberry cheesecakes


Make these. Make a bunch of them. Give them to the people you love. They will be happy!

Warmly, 
Mary

Sunday, June 19, 2011

Sweet Potato Hash


Happy Father's Day!
I am so thankful for a dad that taught me the importance of perseverance and hard work. I don't think I know many people who work as hard as he does. He gave me my love for sports, particularity for the Yankees and the Huskers! I get my strong opinions and desire to share them from him. He taught me the importance of education and that to continue to learn for the entirety of your lifetime. This man raised me in a good Christian home and taught me that it's about a relationship with our creator not about religious actions. And he showed me so significantly his respect for my mother. Happy Father's Day Dad...I know you don't care all that much about food, so here's my tribute to you! 

Ok, now for the reason why you all came here, FOOD...

I don't know why I didn't think of this recipe before! It is a total win in our home. It comes from the love of the traditional greasy crispy fried corned beef hash that the family loves to eat on a regular basis. But it's so greasy and salty and we don't generally eat white potatoes either. I a so happy to share this Sweet Potato Hash with you! I wish you could all come over for breakfast to try it! It is ooohh, so yummy, you won't believe that is a "better for you" recipe! Now I'm not going to act like my new version of Hash is all healthy, but it is tons healthier than the version we used to eat.

I made mine on a whim a few days ago, and it was perfect! So just for fun, I searched for a recipe on-line to compare. I have no desire to try any of the recipes that I came across...this one is perfect, it tasted perfect, the warrior and the princess cleaned their plates and wanted more! I don't blame them...it is really good and super easy!

Anyway, I better get going. This one is on the menu this morning for a little warrior and princess to bring their superman dad for breakfast in bed! I am so extremely thankful that my children have a loving and dedicated dad to celebrate today! Happy Father's Day Superman! Happy Father's Day to all you dads! 


Sweet Potato Hash

Ingredients
1lb breakfast sausage
1 sweet potatoe
1/2 onion
4 garlic cloves

4 eggs (optional)

Wash and dice the sweet potatoes into small pieces. I kept the peeling on, there's nutrition in there! Boil the potatoes in a medium pot of hot water until they are fork tender...not mushy. Brown the breakfast sausage over medium heat in a large skillet. Dice the onion and mince the garlic while the the sausage is browning. When the the sausage is just about done, drain the grease, do not rise it under water, you don't want to rinse off that great flavor! Just drain it. When the potatoes are done, drain the water and add them to the cooked sausage and turn the heat on the skillet to med-high. It needs to be HOT! Add the onion and garlic. Press down the meat mixture and cook for 2 - 3 minutes. Stir and press down again and cook for another 2- 3  minutes. If it looks crispy, then it's done. If not, press down again and cook for another 2 - 3 minutes. The goal is for nice crispy crunchy potatoes...not burned! I topped mine with a fried egg for each serving.  

Oh, yummy! Go make some now! You'll start keeping sweet potatoes and sausage on hand after this one!


Enjoy!

Warmly,
Mary

Friday, June 17, 2011

The Birthday Cake


Happy weekend, Friends!

This recipe is definitely a gift to you for the weekend. I hope you have a chance to make it sometime. Oh, these cupcakes were the cutest and yummiest things ever. Ok, the mini chocolate peanut butter ones are really good too. But the little lady bug truffles were so adorable and yummy and the strawberry frosting had some serious goodness going on too. The truffle centers were cookie dough. Yep, now you have a perfectly good excuse for eating raw cookie dough. You should have seen the princess and warrior and their little friends hanging around while I made the little lady bugs the day before the party. They were all over some cookie dough action! I used a chocolate cake recipe that I found on another food blog. It was tasty, but not my recipe. If you want a good chocolate cake recipe, try The Very Best Chocolate Cake here, it really is the very best that I have found...so far! The Frosting is my recipe and so are the lady bugs. I am so pleased with how the little lady bugs turned out, I'm so glad that I made them, I feel like they were practically guests at the party! And you know you can't go wrong with a chocolate and strawberry combo. And have I mentioned how adorable the little ladybugs were, they seriously made me smile every time I looked at them! Ok, enough rambling...my weekend gift to you!


Lady Bug Cupcakes

Strawberry Cream Cheese Frosting

Ingredients
1 8oz pkg strawberry cream cheese, room temp
6 Tbl butter, room temp
1/2 c strawberry preserves
4 c powdered sugar

In a mixing bowl, beat the cream cheese and butter until creamy. Add the strawberry preserves and mix until well combined. Slowly mix in the powdered sugar one cup at a time until you have the desired consistency. There you go! Super simple and better than anything you're going to get out of a can!


Cookie Dough Lady Bug Truffles

Ingredients
1/4 c butter, room temp
1/3 c brown sugar
1/2 cup sweetened condensed milk
1 1/4 c all purpose flour
1 tsp vanilla
3/4 c mini chocolate chips
1 lb Red vanilla candy coating
2 pkg Hershey's Drops Candy
Candy eyes (from Michaels)
more mini chocolate chips

In a mixing bowl cream the butter, sugar and vanilla. Add the milk and flour and beat well. Stir in the chocolate chips. Line a baking sheet with waxed paper. Roll the dough into little balls and place on the waxed paper. Set in the freezer for about 15 minutes, for easier dipping.

In a zip-lock baggie, melt about 1/4 cup chocolate chips in the microwave for 30 seconds. Snip a tiny corner off the end with scissors. Lay the Hershey's Drops out on the working surface. Squeeze two small drops of melted chocolate on the round candy Drops and place a candy eye on each drop to make the head with eyes. Prepare all these ahead of time because the candy coating hardens quickly and you won't have time to do it as you are dipping.

Melt the chocolate or candy coating according to package directions. Take a few balls out of freezer at a time and dip into the coating, remove as much excess coating as you can and set on a sheet of waxed paper. Place a head with eyes on one end of the ball and hold it in place for a few seconds then place mini chips, flat side up, on the back of the lady bug for black dots. There you go!


Perfect little Lady Bugs!

Enjoy!

Warmly,
Mary